To aid my coloring process, I often use two ink colors and separate them digitally to save me time when it comes to coloring in the line art for arial perspective or character details. I am creating this post to help anyone else looking to speed along their own coloring process.

Holy Diver spread (original ink)

Holy Diver spread (final color)
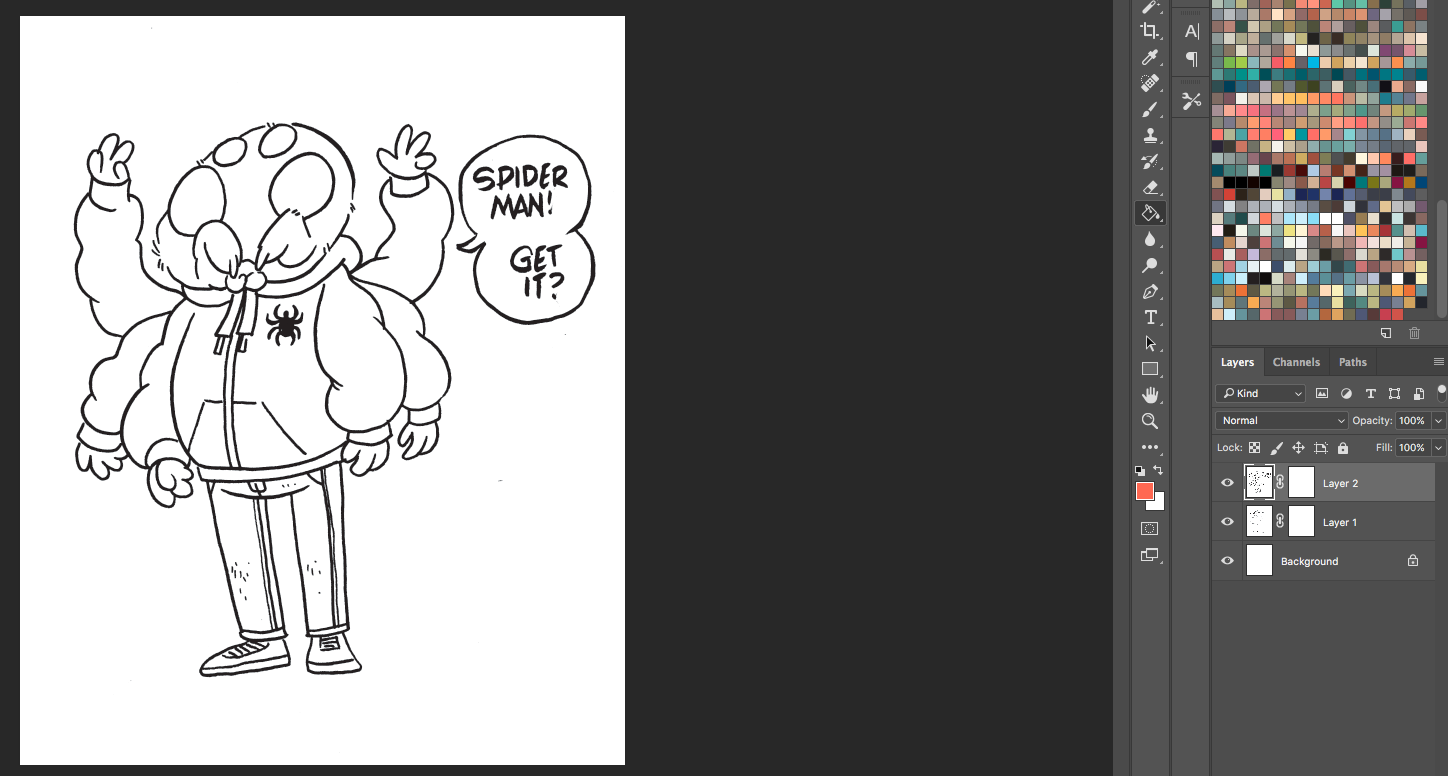
I am using a goofy doodle to demo this. Here's Spiderman, unedited. I have converted this color mode to CMYK (you cannot proceed with this process in RGB, which is the default color mode a scanner saves images as).

Now we need to adjust the red and black ink to make sure it is as close to magenta and black as we can without loosing too much detail. For this, I will do a minor level adjustment first, then use selective color to alter the red. I have found red ink – as opposed to magenta ink – adjusts best. Specifically, I use Calli red or a red sumi ink. Red micron and many red colored brush pens are also suitable for this process, as well as a bright red acrylic ink. Your best bet is a red that does not cluster in dark shadows that the scanner might interpret as blackish.
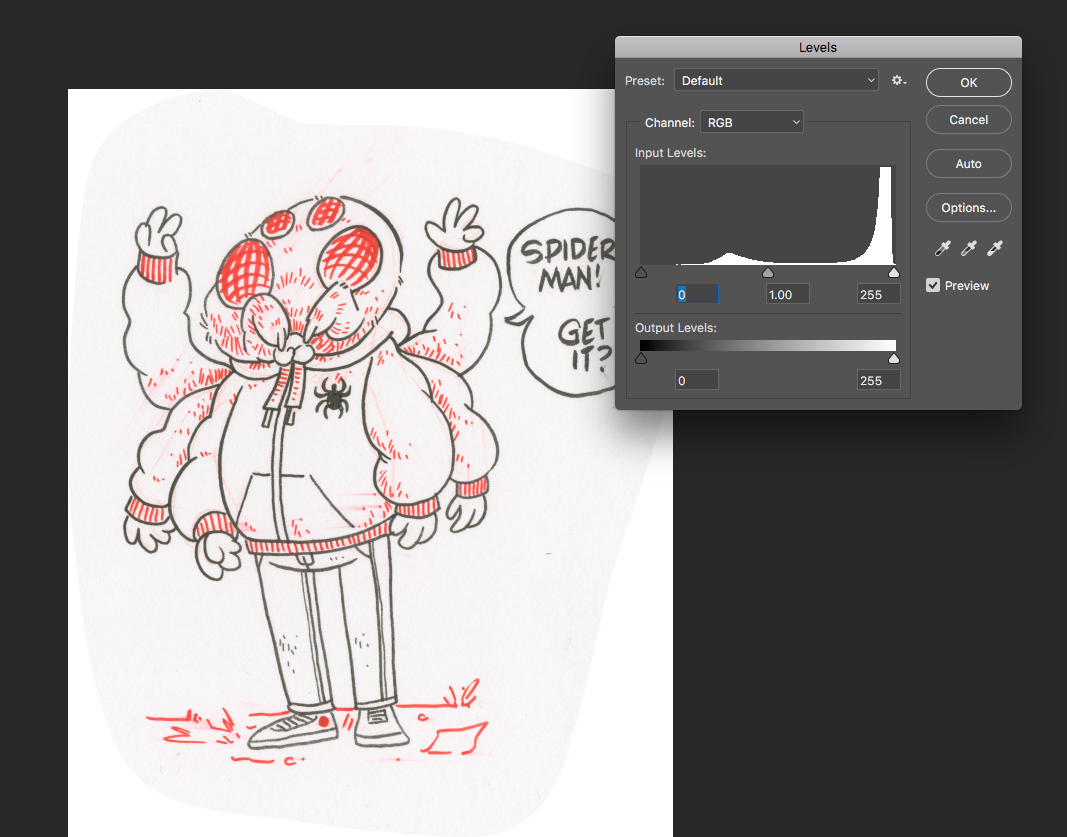
A slight level adjustment. (image > adjustments > levels)

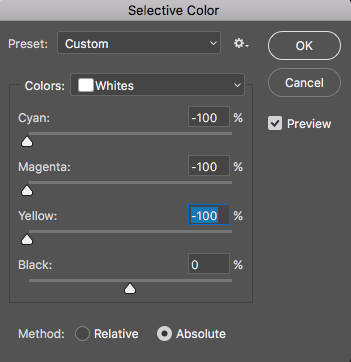
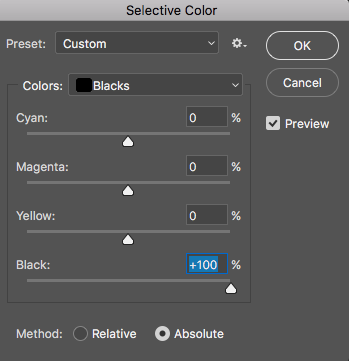
The Selective Color pallette (image > adjustments > selective color)
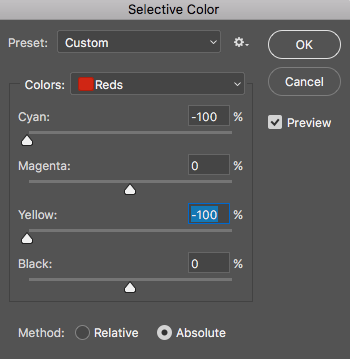
Now I will open the selective color palette; set my method to "absolute"; and adjust the red, white and black respectively. You may have to repeat this process a few times to get the white and black to where you want them, but I suggest only adjusting the red once or twice. Do not specifically adjust the magenta.
Below you can see how I adjust each color to produce the cleanest line art. This takes a little finesse and practice, and often requires multiple selective color adjustments. I have this pallete set to a keystroke to speed things along.
Always remember to save your original scan separately from the scan you are adjusting. CMD+Z is a magic tool, but won't help you if you get to the end of this multi-step process and realize something is slightly off.
Now that my colors are clean, I will use the Channel Mixer (image > adjustments > channel mixer) to pull apart the red and the black. Make sure you click the "monochrome" box at the bottom of the palette.
This step is tricky! You need to slide those magenta, cyan, black, and yellow sliders until there is no longer a little ring around the line art you don't want.
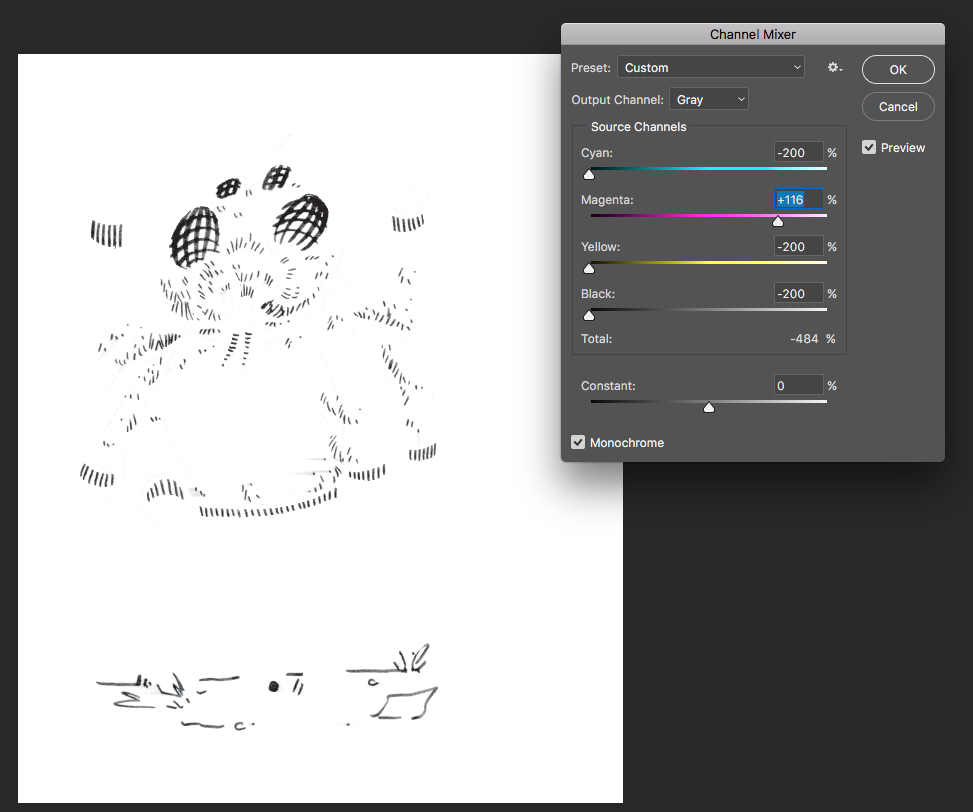
I always do my magenta layer first. I'm not sure why. It's just a thing I tend to do.
When you are done, "select all" (CMD+A) and copy the art. Paste that art into your final template.
IMPORTANT!!!!! Wait until you have both sets of line art pasted into your template before you do any resizing, as you will have to select both layers and resize them at the same time. Otherwise, it will be impossible to line the two sets of line art up.

CMD+Z back until you have the color corrected art and repeat the Channel Mixer process with the black line art.
OKAY! Now you should have two layers in you final document, each with its own set of line art. Unfortunately, you also have the white background. You can separate lines from the background a number of ways, but I find the cleanest way to do so (without losing fine detail) is the Layer Mask.
HERE'S HOW YOU DO THAT:
1.)Put a layer mask on both of your line art layers...
2.) For each layer: Select All (CMD+A).
3.) Cut out the art (CMD+X).
4.) Hold down the ALT key and click ON the layer mask. Now you are INSIDE the layer mask. Paste your art in place (SHIFT+CMD+V).
5.) Because of how layer masks work, you will need to invert your line art. (CMD+I)
6.) You will need to do a level adjust your whites and blacks in the layer mask, as the art has probably posted in SLIGHTLY grey. Not grey enough for you to see, but just enough to affect the density of your line art. At this point, you want to make sure the whites are as bright as they can be.
Don't worry, if you fill the layer and find your art isn't quite right, you can always select the layer mask and continue to adjust your grey balance.


7.) Click off the layer masks by clicking on the layer. Now you can fill each layer with whatever fill you want.

Now you can go in and color those lines whatever you want them to be!
I realize how tedious this seems, but you would be surprised how quick you get at this process after you do it a few times. It saves me hours of singling out specific line art from the main line art for coloring. If you ink traditionally, I highly recommend it.

Hope this is helpful! Keep arting!
(*Please Note: I have a MAC, so my keystrokes reflect MAC keystrokes. For PC, replace CMD with CTRL and ALT with OPTION)