Contents

1970s Punk Zines
Zines are self published booklets. Unlike most published material, zines are produced entirely by an artist or artists. They can serve as periodicals for fandoms (fanzines), writing anthologies, gatherings of political ideologies, or pure artistic expression through comics, illustration, or poetry. Essentially, a zine can be anything its creator wants it to be, whether it is a mini-comic or a manifesto (or combination of the two). Because they are self published and produced, they are void of editorial oversight or interference. Anyone can make them and distribute them in whatever way they wish.
There’s a good sized community out there for any kind of zine you can think of, not to mention numerous local and national zine fests where zinesters can gather to trade their books. They have long served the comics community as a way to tell a story that is short and unfettered. Some zines are akin to tiny works of art: riso printed, screen printed, hand bound, and full of fancy papers. Others are quick and dirty fold-ups that serve the purpose of any ephemera, a quick relay of information.
The purpose of this post is to focus somewhere in the middle of those two extremes. Coming from a background in comics and illustration, I have always loved self publishing and mini comics. Why wait for an editor to approve your story when you can produce it yourself? And, in fact, the first ORCS! books were zines I made for my first indie comic shows. They proved I could tell a story in a limited space, and showed proof of concept when it came to my weird fantasy world.
But I also love making mini comics to simply tell a story. And to get that story out to people who might be interested. Sure, you could make a webcomic or post a short story on social media, but those options are almost more ephemeral than a zine. There is something about the printed page that stays, that feels like a small and secret treasure, that feels real in a way that is hard to achive on the internet, with its constant scrolling and shifting Terms of Service.
So, whether you use the information below to make one zine– mini comic or otherwise– or you use it to make a hundred (or a few hundred), I hope you give the adventure of self publishing a try.
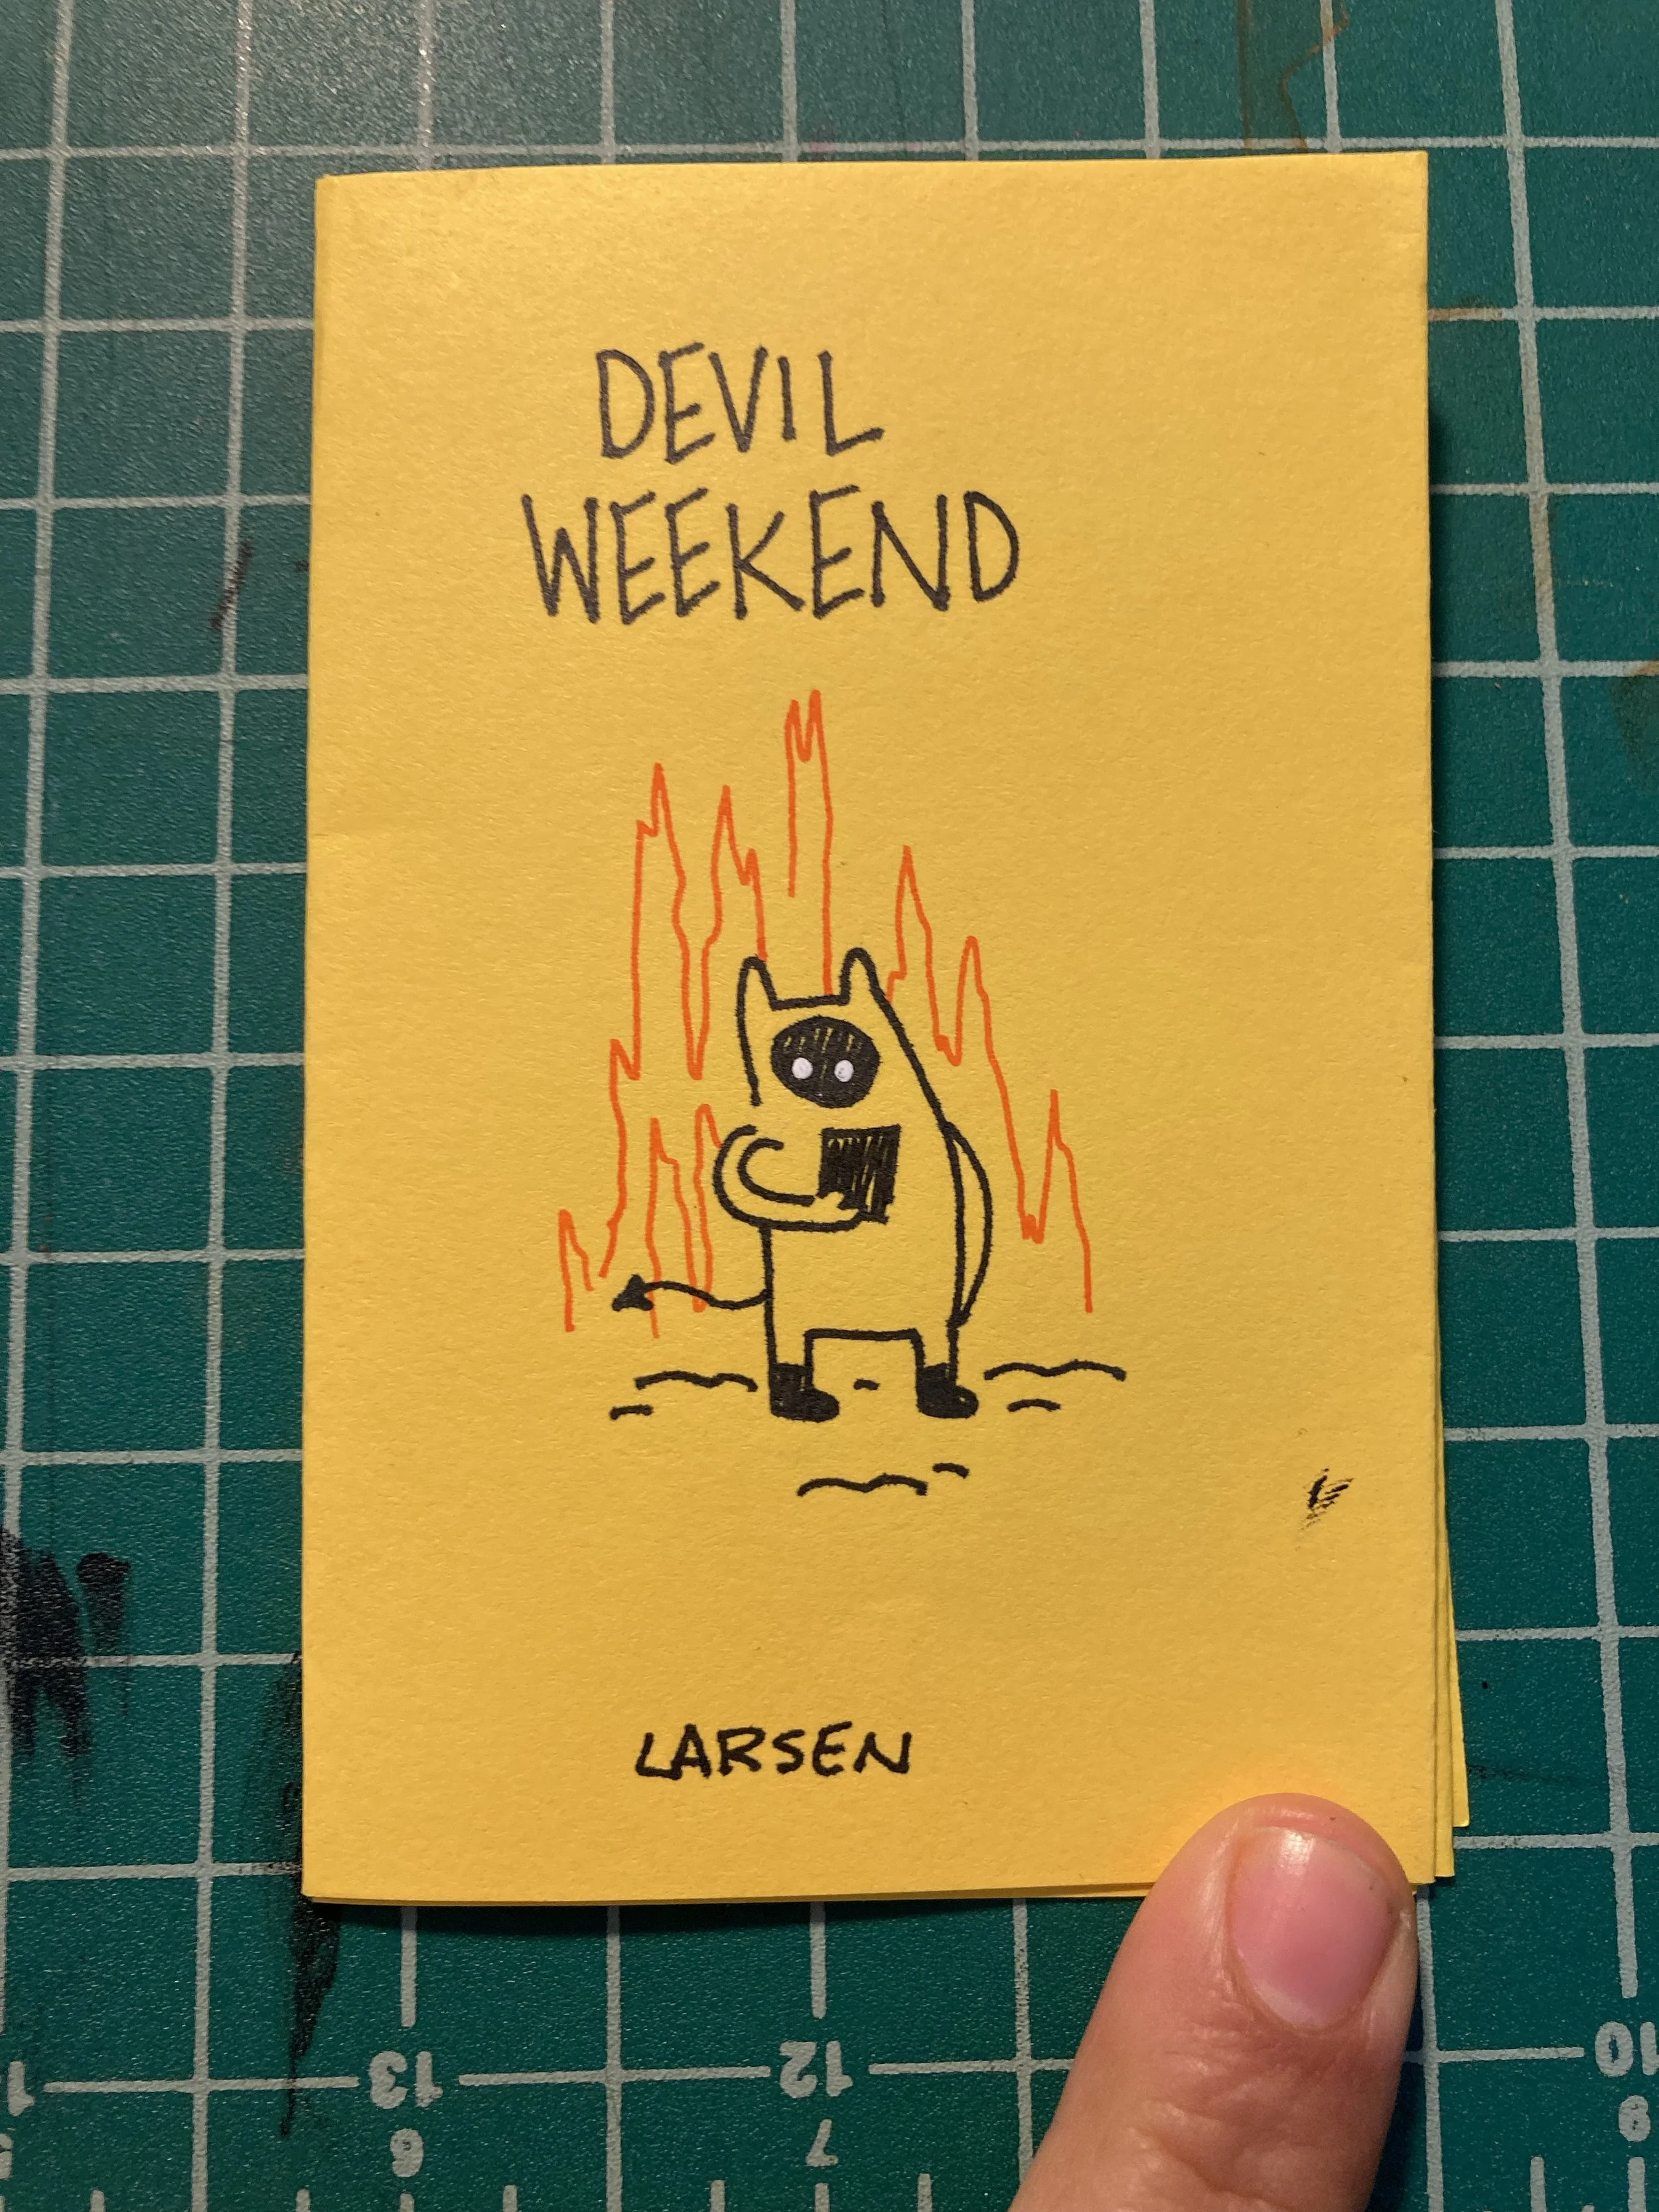


Foldable Zines are made from a single sheet of paper, and they are probably the easiest to produce, even though folding your first piece of paper may get a little confusing.
These make for great, cheap zines to sell at cons, a special one-off for a friend, or (my favorite) a fun project for the kiddos.
You could also include them as inserts in a larger zine or booklet, a special add on for enamel buttons, or a givaway for fans of your work. The possibilities are endless and up to you. The best part of folded zines is that they can be unfolded, leaving a blank side where you could put surprise art or a poster.
Lots of fun stuff to be done with the foldable zine! So, how do you make one?
You will need:
a sheet of 8.5 x 11” paper (letter size)
scissors
And that’s it! You can preprint your zine using the template at the end of this post, or fold the paper and draw on it directly. The choice is yours.
How to fold and cut your paper:
This image is not mine. I found it on a number of blogs and do not know who drew it first. If you know, please leave their name in comments so I can credit them.
Step 1
Take your piece of paper and fold it in half vertically.Step 2
Unfold the paper, turn it horizontally, then fold the edges into the center of the paper.Step 3
Fold the paper in half.Step 4
Unfold the sheet of paper.Step 5
Holding the paper horizontally, push the ends in so the center sections pop up.Step 6
Cut the paper along the fold made by folding the sheet vertically.Step 7
Holding the pages, fold the paper over to form a pinwheel shape.Step 8
Fold the paper into a booklet shape.

Gif from https://www.northing.no/minizineopencall

Whether you’ve printed them out, or draw on them directly, you can take this time to trim the edges if they’re a bit wonky. Personally, I will buy a foldable despite wonky edges, but you do you.
The Dream 1/4 page mini comic
Stapled zines are probably the most “book like” in terms of creating a finished piece that feels professional. You have more finishing choices to make here, as well as options to have your book professionally printed by a printing shop.
But I am going to focus on making small runs at home. Most print shops, which will fold and bind your zine for you, do not produce books at a price that makes them affordable for a reader until you are publishing 100+ copies. And I don’t suggest doing this on your first go. If you have a large audience, then this makes sense, but if you are still building your practice, making smaller runs will keep you from overspending.
There is also the added bonus of creating zines with multiple types of paper, inserts, and even french folds, which are expensive options when you print at a print shop.
Making your own zines will also teach you a lot about the process of production. This will help you make art that suits production, instead of creating specialty illustrations and comics that are difficult or expensive to reproduce.
First, let’s discuss some paper terms I will use a lot, but have specific definitions.
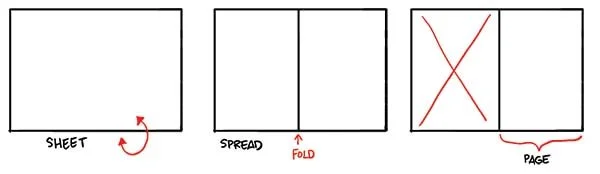
Sheet: A sheet refers to the entire paper, front and back. It consists of 2 spreads.
Spread: A spread refers to one side of a sheet. It consists of 2 pages.
Page: A page refers to one half of a spread.
The Math
I hate math too, but it is important to know the space you are working with before you begin laying out your story. Keep in mind that each sheet of paper will yeild 4 pages, so all interior art must be divisible by 4.
So, an 8 page zine will require 2 sheets of paper, a 12 page zine will require 3, a 16 page zine will require 4, etc. This is important when budgeting your project. If you are taking your pages to a copy shop, knowing how many double sided copies you need will determine the base price of the zine and therefore what you might charge for it at a show (general rule of thumb is to double the base price for the sale price).
Unless you are flush with cash, you probable only have a set amount with which to produce x amount of copies. Keep this in mind when writing your zine, because the longer the story the more costly the printing. Be on the lookout for places where you can get cheap or free prints, and consider keeping your zine art black and white. This cuts down costs and enables you to use printing options that are poorly calibrated, therefore less expensive.
Supplies
Long arm stapler (preferrably with a stopper)
A double sided printer or access to a double sided printer
guillotine/paper cutter (optional but useful)
cover stock for covers (80-100lb) (optional, but nice looking)
copy paper for interiors (20lb)
The Half Page Zine
If you are making a comic, the half page zine produces a result closest to a standard American comic in its dimensions and available space. A half page zine is a Letter Size Sheet folded in half, creating a page size of 5.5 x 8.5. You can download a template of the half page zine below.
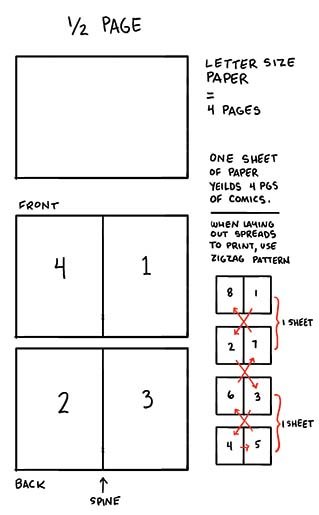

Here’s where things can get confusing if you are making a zine that is more than 4 pages, because–unless you are sending that zine to a print shop to have it assembled–you need to set it up so that it will print the pages in the correct order once they are folded.
The best way to do this in your layout program is to use the zigzag pattern, starting on the right hand side with page one, continuing down until there are no more spreads to zig zag to, moving to the right again and zigzagging up (pictured left).
You’ll notice the even pages are always on the left, and the odd pages are always on the right. This is a good way to check and make sure that you’ve laid the zine out correctly.
Once you’ve done this, it is only a matter of making a pdf you can print from, and insuring that the pages print head to head (alternatively, you may be asked to pick “short edge” or “long edge” binding. Since we are folding on the short edge, you want to flip the page on the short edge.)
Print your cover art separately, even if you are using the same paper on the exterior and the interior. It will make your life far less confusing in terms of printing while affording you the option to upgrade or change cover paper at a later date.
Side Note…
Certain programs will allow for “booklet printing”, including adobe Acrobat. That means you would not have to use the process of setting up your spreads beforehand in a zigzag pattern. All you would need is a PDF of all your pages.
HOWEVER, I have used this printing option to varied results, and have found that setting up pages manually is more reliable in terms of the final printing, because you do not have to fiddle with printer settings for margins, printable areas, or paper source. This is also not an option if you hand a file over to a copy shop, or hijack a zerox machine with hard copies.
Most copy shops either don’t deal in booklet printing, or will charge you extra to print your pages out that way.
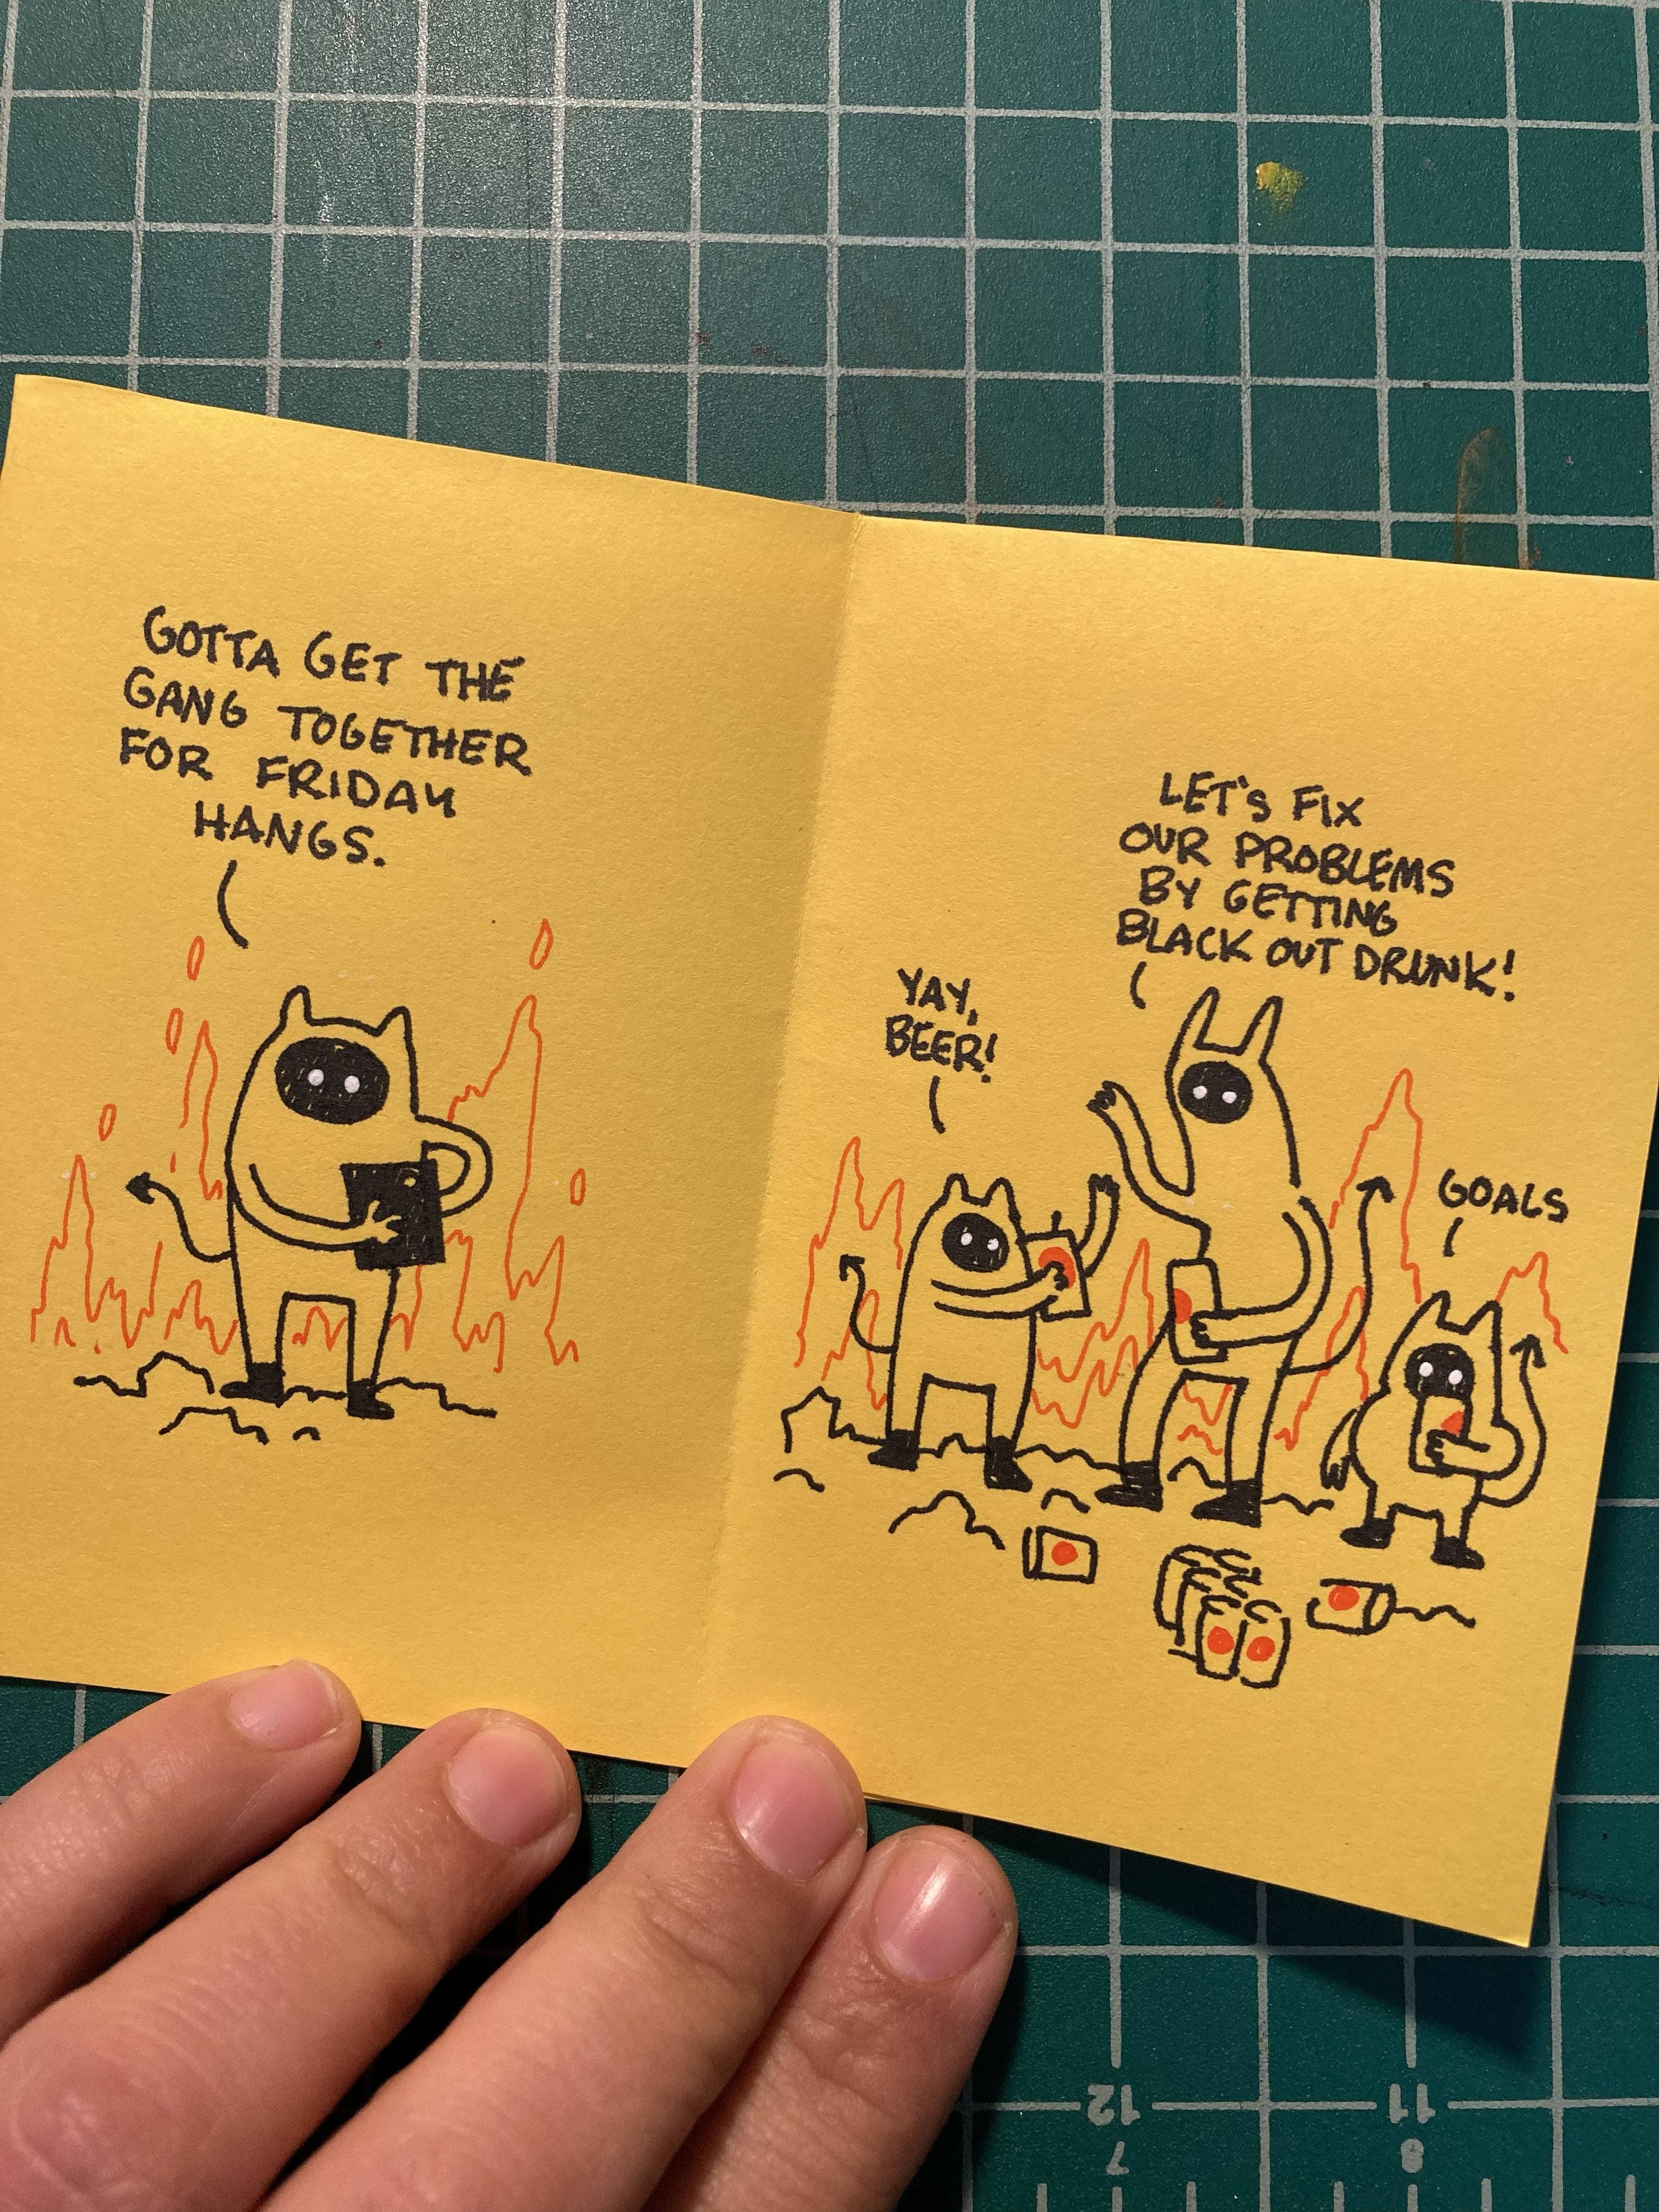
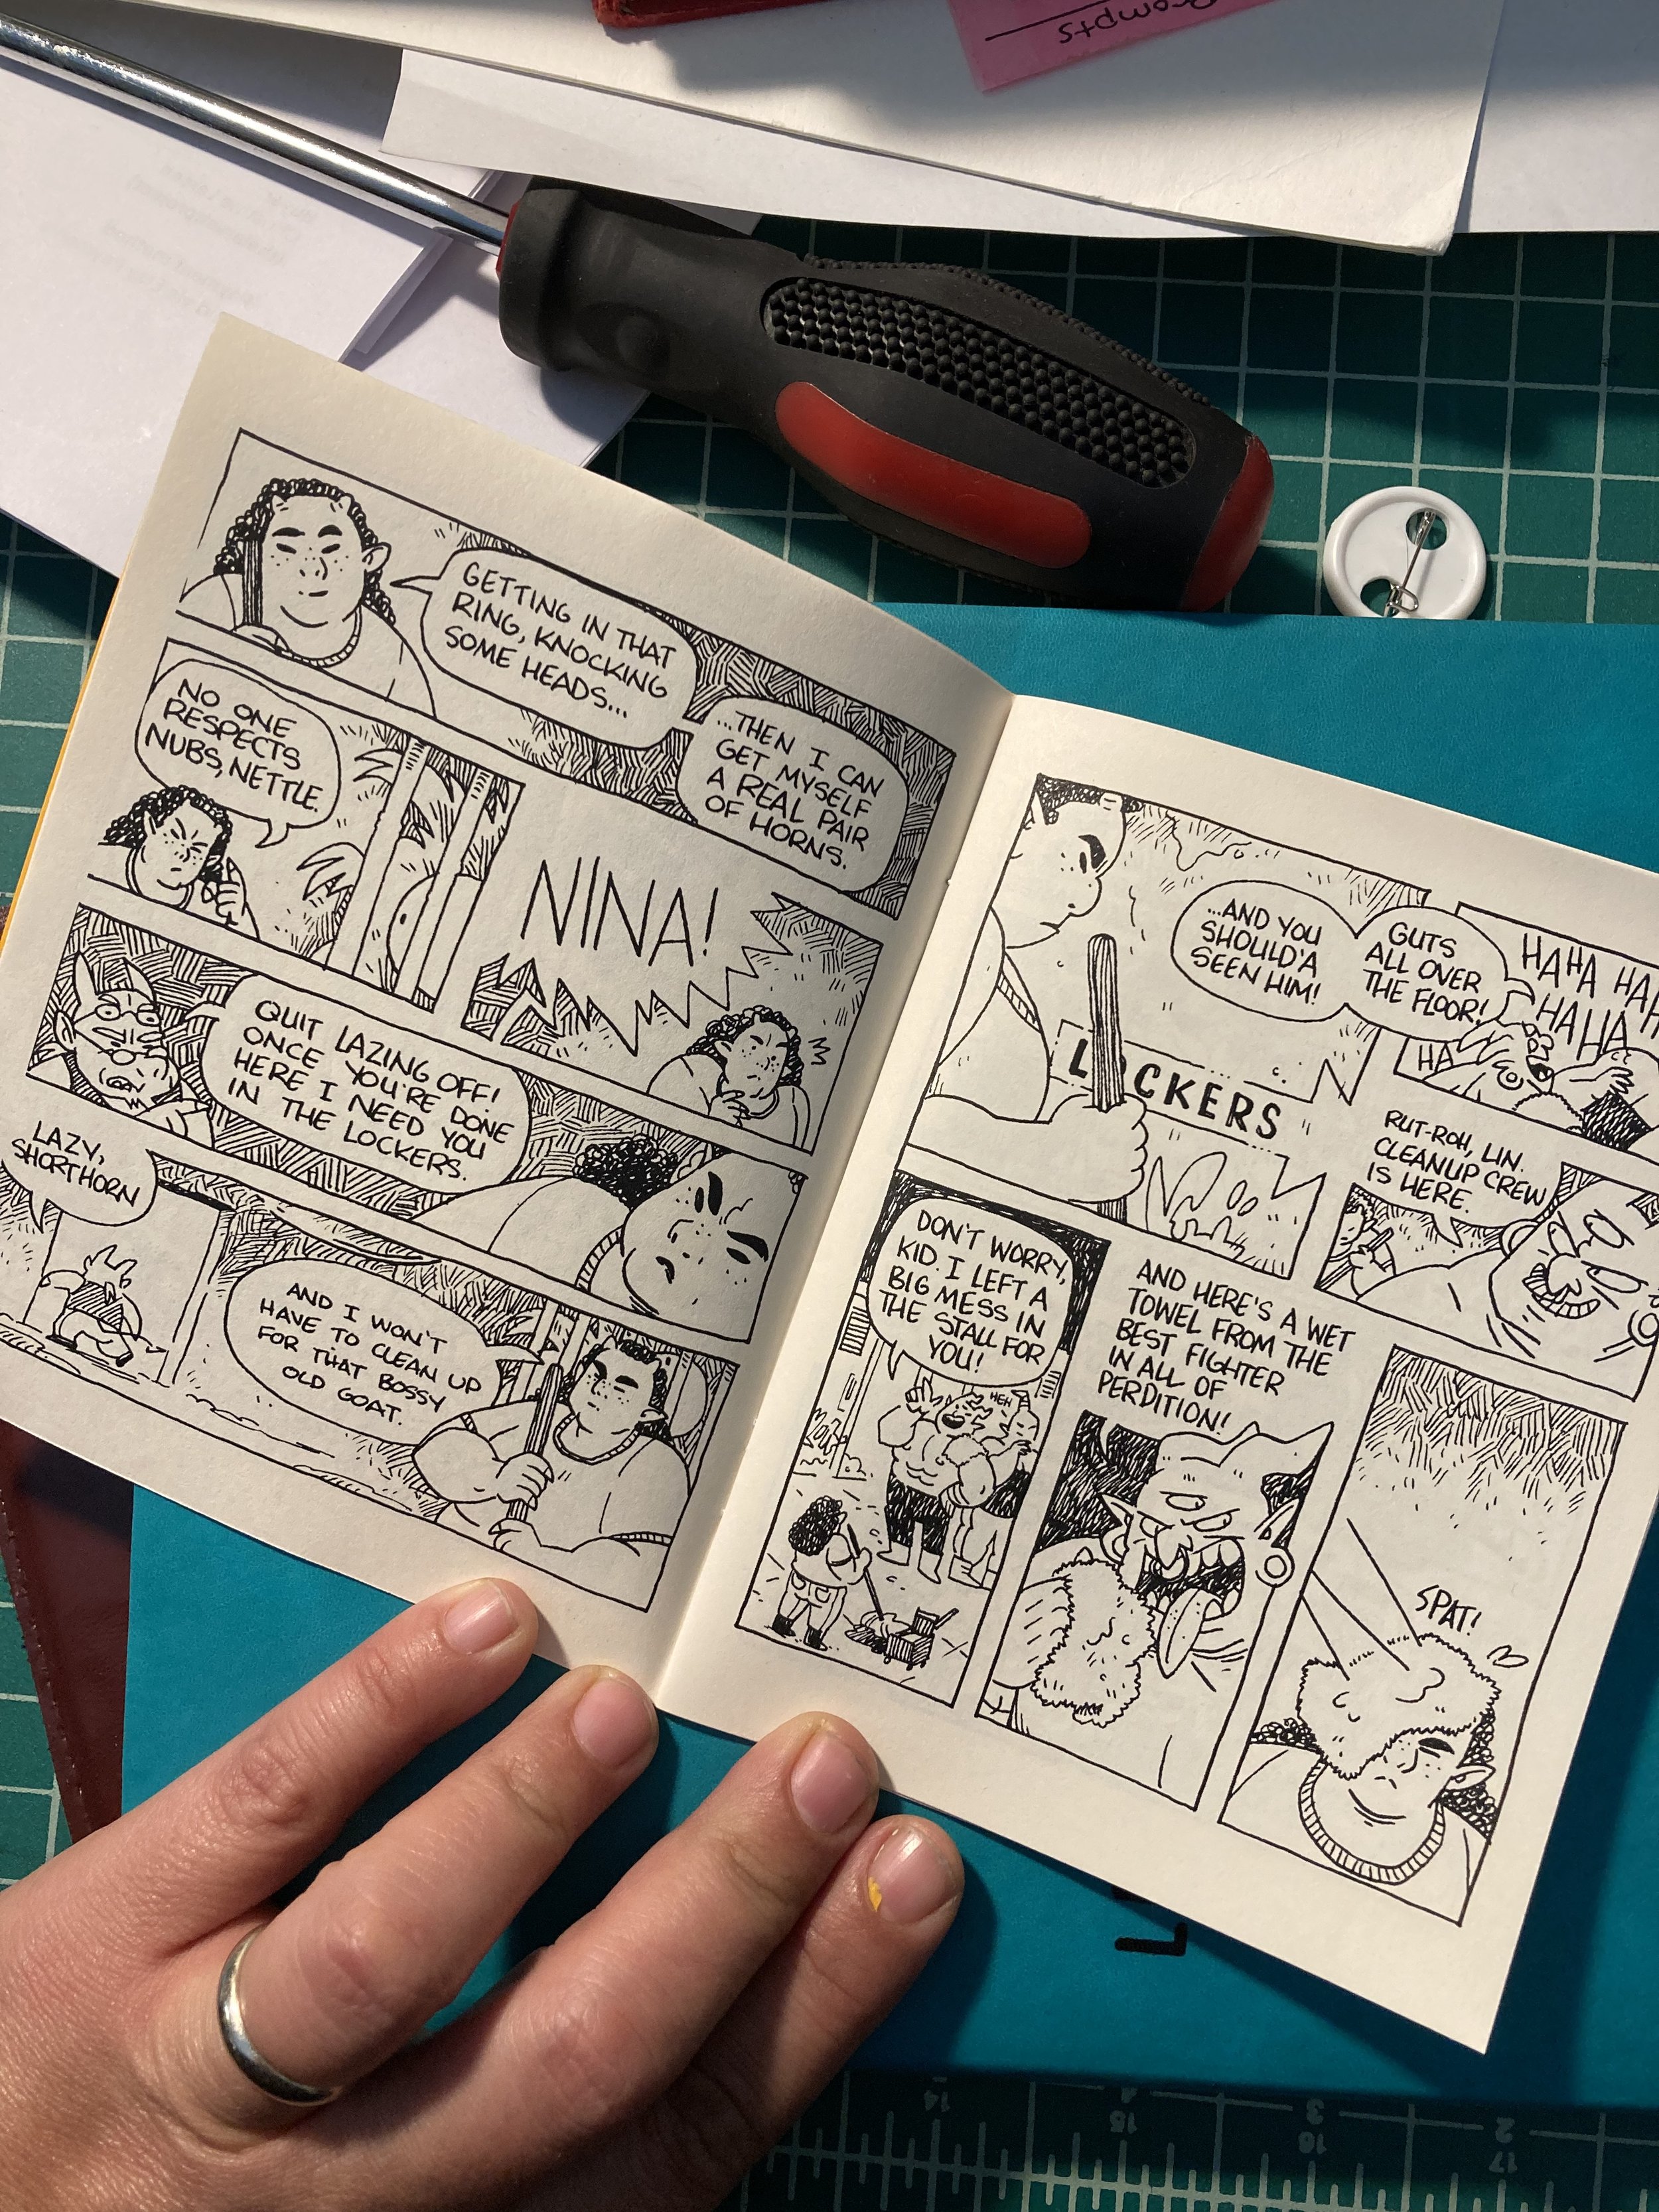
The Quarter Page Zine
Quarter page zines are the most cost effective of the stapled zines, because each sheet of paper will yeild 2 copies. Folded, this zine measures 4.25 x 5.5”. There is a page template for the quarter page zine below.
This can get even more confusing than half page zines, but take the time to figure it out. Quarter page zines may be small, but once you get the hang of them they are a great way to produce pocket-sized books.


For Quarter Page Zines, the sheet of paper will be cut in half after it is printed (which is why a paper cutter is so handy). This means that each sheet of paper becomes 2 sheets of paper yielding 2 copies of each spread.

The least confusing way to lay this out is to lay out your spreads using the same zigzag pattern as the half page zine. Then duplicate those spreads so there are 2 spreads printing on top of one another per 8.5 x 11 sheet of paper (pictured above).
Be careful with your measurements here! If your placement is off the margins for each spread will be different, so make sure you are setting them up on the right size paper.
For the 1/4 page zine, you will still need to flip your art head to head, but if given the “short edge binding” or long edge binding” option, you want “long edge binding”, because the sheet is being folded in half vertically after it is trimmed.
Print Your Cover Separate. In the same way it does for the half zine, a separate cover file is easier to manage when printing and gives you options later.
My biggest suggestion for art is to try to create compelling images in black and white. Certainly, color printing is always an option, but it will be more affordable for you, the artist, and your readers if you relegate color imagery to the cover.
You can download a PDF of useful tips for creating black and white art here: Black and White Art.pdf
You can download a PDF of creating tones in Photoshop here: Tones
Most importantly, you want to create art with no bleed. Bleed is when an image runs to the edge of the page , but this is less of an option when you are using a printer or copier, which normally has a margin of 1/4 inch. All templates have been designed with the margin in mind.
Wishing you all the best of luck in your zine making! Please share and comment. And let me know if links aren’t working!